Use Signer Service
Preparation Work
You need to prepare a dedicated device, preferably on the same local network as the machine running the Otmoic LP program. Ensure that Docker Compose and Node.js are installed on the device. You can find installation instructions for both here: Docker Compose and Node.js.
Tips
Minimum Requirements:
- 1 CPU core
- 2 GB RAM
Recommended Configuration:
- 2 CPU cores
- 4 GB RAM
Initialize the code repository
git clone https://github.com/otomic-agents/vault.git
cd vault
npm install
Creating an EVM Wallet
npm run manage-evm-keystoreFollow the prompts to enter the following:
- generate(Operation type)
- pass(Password)

Creating an Solana Wallet
npm run manage-solana-keystoreFollow the prompts to enter the following:
- generate(Operation type)
- pass(Password)

Start the signature server
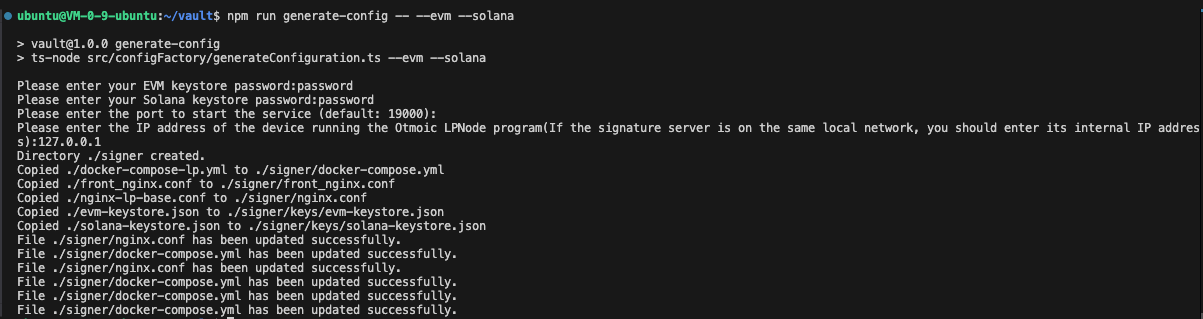
- Preparing the Startup Configuration To generate the configuration file, run the following command:
npm run generate-config -- --evm --solanaWhen prompted, enter the following details:
- EVM Keystone Password
- Solana Keystore Password
- Server Port
- OtmoicLP IP
The tool will create the configuration file in the ./signer directory.
Tips
The SIGN_MSG_WHITELISTS field in the template has two types of configurations.
For EVM, the entries ip-OtmoicSwap-Message,ip-Otmoic Reputation-Complaint are used for normal operations. the entries *-Terminus DID Root Tagger-AuthAddressReq,*-Terminus DID Root Tagger-EVMAuthAddressReq,*-Terminus DID Root Tagger-SolanaAuthAddressReq are used during the signature verification process.
For Solana, the entries ip-* are used for normal operations. the entry *-prove ownership of Solana wallet are used during the signature verification process.
- Start the server
cd signer
sudo docker compose up -d
Submit the wallet address to the blockchain for verification
When performing this operation on the signature server, you need to use the owner private key of the Olares DID for signing. You can obtain the Olares DID owner private key by following this tutorial.
Once you have the owner private key ready, switch the signature server configuration to submission mode. Update the SIGN_MSG_WHITELISTS to include
*-Terminus DID Root Tagger-AuthAddressReq,*-Terminus DID Root Tagger-EVMAuthAddressReq,*-Terminus DID Root Tagger-SolanaAuthAddressReq, and*-prove ownership of Solana wallet.
- Submit the authentication signature
cd ~/vault
// Authenticate the EVM wallet address
npm run add-evm-auth-address
// Authenticate the Solana wallet address
npm run add-solana-auth-address
Enter the following details in sequence:
- Olares ID
- Olares ID owner private key
- Wallet address (You can find it in the logs generated during the process, or check your keystore file)
- Signature server signing address (The default startup port is 19000, which you can modify in the front_nginx.conf file. If you have followed the previous steps according to the tutorial, the addresses here will be http://127.0.0.1:19000/lp/9006/signEIP712 and http://127.0.0.1:19000/lp/501/signEIP712)
When you see {"code":0,"message":null,"data":{"code":0,"message":"OK"}}, it indicates that the operation was successful, and this wallet address has been authenticated on the blockchain. 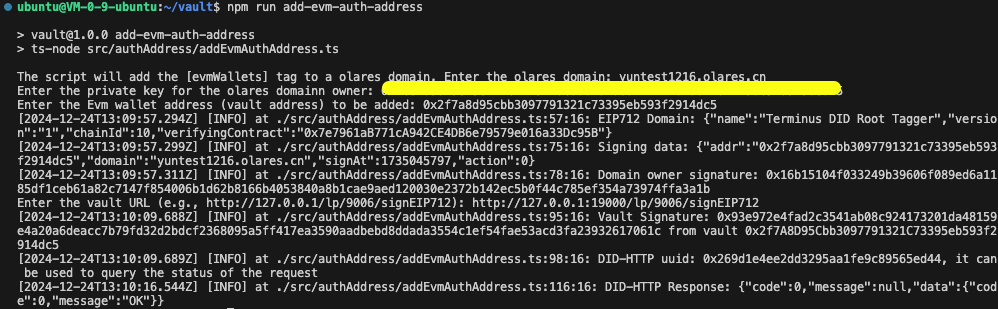
Tips
When you have completed the wallet address verification, please switch the SIGN_MSG_WHITELISTS back to provide signing services for transactions.
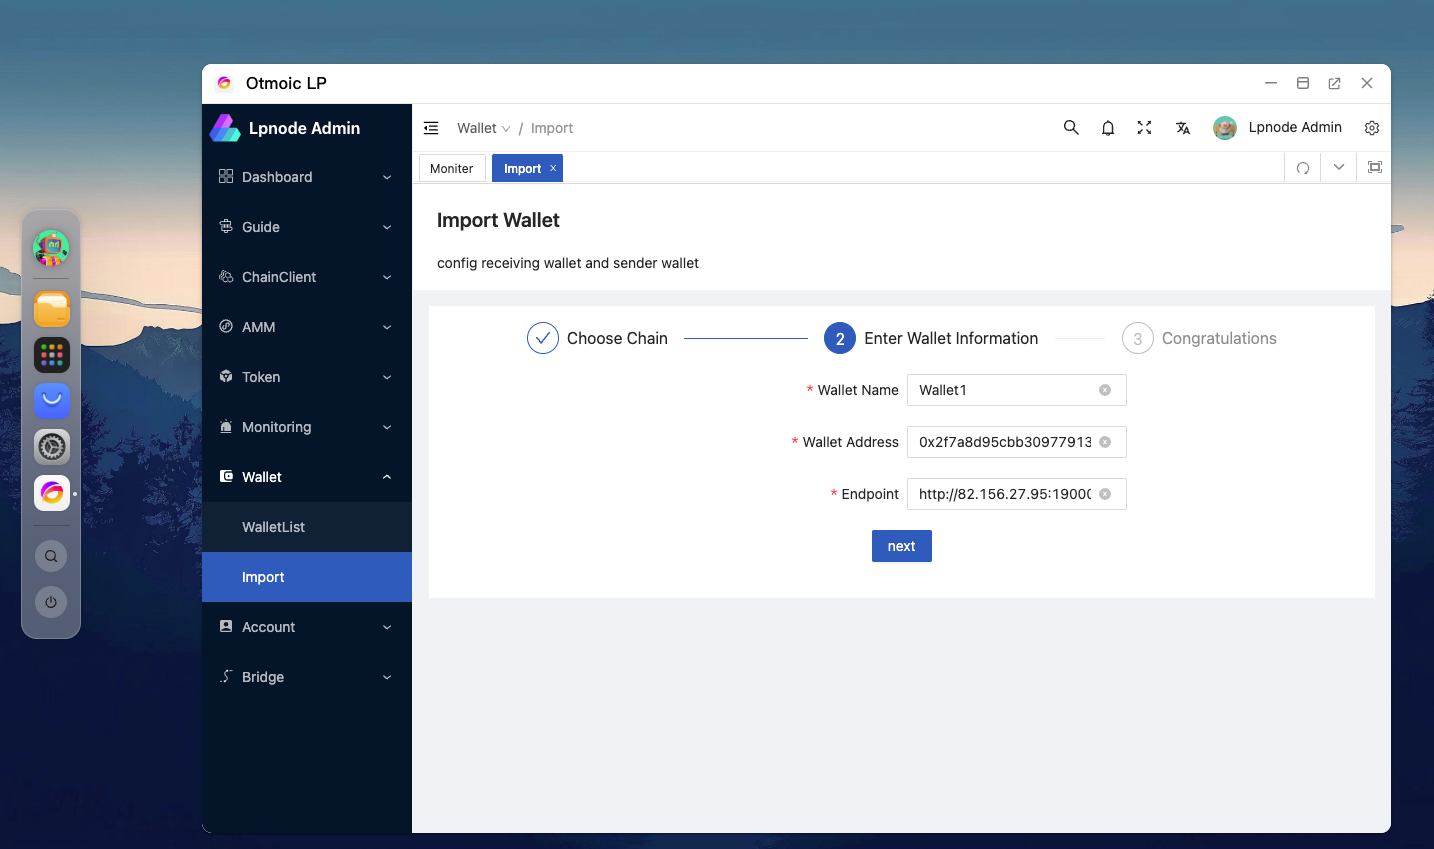
Configuring the Signature Server in Otmoic LP
Open the Otmoic LP management page and navigate to Wallet -> Import. Then, follow the prompts to select the blockchain of the wallet, enter the wallet address, and provide the service address of the signature server, If you have followed the tutorial exactly, the entry here should be filled in as http://<signing server IP>:19000.
Make sure to input the correct details to ensure successful integration with the signature server.